Introduction to TensorFlow Serving
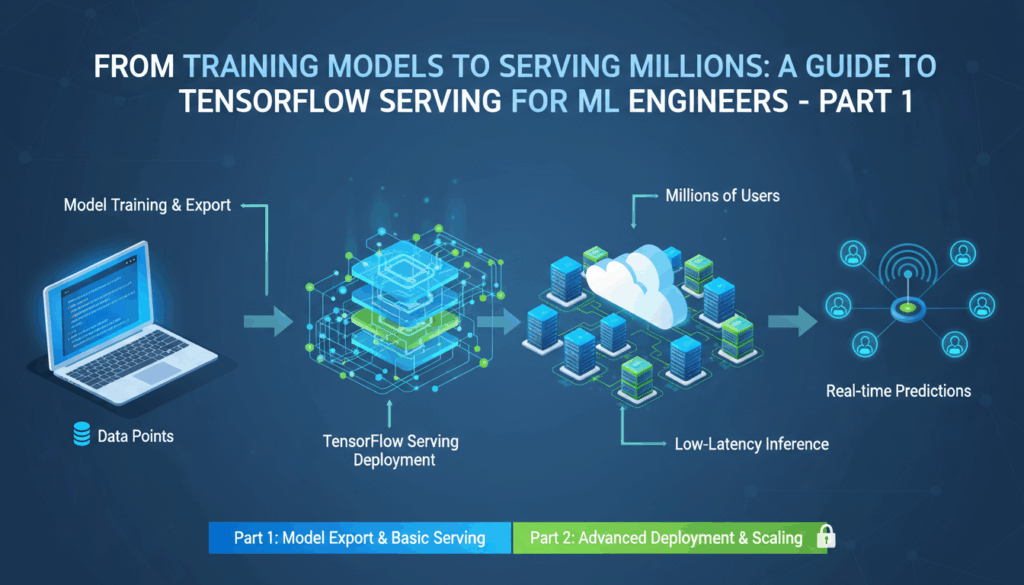
TensorFlow Serving is an essential tool designed to make deploying machine learning models seamless and efficient. It’s particularly useful in scenarios where models need to be moved from development to production environments with minimal disruption, maintaining high performance and scalability as more queries hit the server.
When building ML models, training is just the beginning. Once you’ve perfected a model’s architecture and it performs well on new data, the next step is deploying it so that others can use its predictions in real-time applications. This is where TensorFlow Serving becomes invaluable.
One of the primary advantages of using TensorFlow Serving is its ability to handle multiple model versions efficiently. This feature allows developers to deploy newer versions of their models easily without interrupting service. It supports a dynamic environment where different versions can be tested, compared, and switched swiftly based on the performance metrics or other business requirements.
To start with TensorFlow Serving, the process typically involves the following steps:
First, export the model you want to serve. TensorFlow uses the SavedModel format for this purpose, which contains the complete information about the model, including weights, computation graphs, and input/output signatures. This portability ensures that models remain consistent across environments.
Next, set up TensorFlow Serving on the server infrastructure. Installation can easily be done on Unix-based systems, thanks to Docker images provided by TensorFlow, which simplify the deployment process. Running TensorFlow Serving in Docker allows developers to leverage containerization benefits, such as environment consistency and resource isolation.
Once TensorFlow Serving is set up, load the exported model using the configuration options available. TensorFlow Serving’s configuration framework facilitates the management of model lifecycle events, where changes and updates can be managed in a controlled way. This ensures the server remains responsive even as new versions are loaded or old versions are retired.
It’s also noteworthy to mention TensorFlow Serving’s support for gRPC and RESTful interfaces, which provide flexibility in communication and integration. gRPC is preferred for high-performance, low-latency scenarios, as it leverages HTTP/2 features, such as multiplexed streams and binary serialization. Meanwhile, REST provides simplicity and ease of use, especially in scenarios where lightweight operations are prevalent or HTTP/1.1 is the architecture of choice.
Monitoring and logging are pivotal in any deployment to optimize performance continually. TensorFlow Serving integrates with various monitoring systems, such as Prometheus, to provide insights into server operations and ensure everything stays on track. These metrics help fine-tune system performance and even guide model improvements.
Through these capabilities, TensorFlow Serving significantly streamlines the deployment and scaling of machine learning models, bridging the gap from research to real-world application. It’s tailored to support stringent performance expectations while maintaining flexibility to accommodate rapid changes and updates — a critical factor in today’s fast-paced tech landscapes.
Setting Up the Environment for TensorFlow Serving
Setting up the environment for TensorFlow Serving is a critical step in deploying machine learning models efficiently and effectively. The setup not only ensures that your infrastructure can handle model serving demands but also establishes a foundation for future improvements and scaling.
To begin, it is essential to ensure your operating environment is prepared. TensorFlow Serving can be run on various platforms, but Unix-based systems like Linux are preferred due to their robust network configuration and efficiency in handling server loads. Ensure your system is up-to-date by executing package updates and upgrades, which minimize compatibility issues when installing dependencies.
Installing Docker on your server is highly recommended for running TensorFlow Serving, as it simplifies container management. Docker provides an isolated environment which guarantees consistent behavior across different machines. To install Docker, start by running:
sudo apt-get update
sudo apt-get install docker-ce docker-ce-cli containerd.io
After installing Docker, enable it to start automatically upon boot using:
sudo systemctl enable docker
With Docker installed and running, the next step involves pulling the TensorFlow Serving image from the Docker Hub. TensorFlow provides pre-built images that are optimized for serving models. Pull the official TensorFlow Serving Docker image using:
docker pull tensorflow/serving
For systems without Docker, Kubernetes can be an alternative option, especially when deploying at scale. Kubernetes offers orchestration benefits, such as auto-replication and automated scaling, although at the cost of increased setup complexity.
Once Docker is ready, it is advisable to create a dedicated directory for storing your models on the host machine. This directory can be mounted into the Docker container, ensuring that the model files are accessible within the container environment. Create a directory like so:
mkdir -p ~/tensorflow_models
With the directory in place, move your exported TensorFlow model files into this folder. Recall that TensorFlow Serving uses the SavedModel format to encapsulate all the information your model requires to function.
Now, you will need to configure Docker to serve your model. This involves running a Docker container with the correct ports exposed and the model directory mounted. Consider the following command as a template:
docker run -p 8501:8501 --name=tf_serving --mount type=bind,source=$(pwd)/tensorflow_models,target=/models/my_model -e MODEL_NAME=my_model -t tensorflow/serving
The above Docker command maps port 8501 on the host to port 8501 in the container, which is the default REST API interface for TensorFlow Serving. It also binds the local model directory to /models/my_model within the container and passes the MODEL_NAME environment variable to specify the model to serve.
You can then verify the server is up and running by sending an HTTP request to the REST API endpoint using a tool like curl:
“`bash
curl -d ‘{
Training and Exporting a TensorFlow Model
Training a TensorFlow model begins with defining the model architecture and preparing the dataset you’ll use. The process typically involves selecting an appropriate model for the problem, such as a convolutional neural network for image classification or a recurrent neural network for sequence predictions.
To start, ensure that TensorFlow is installed in your environment. This can be done using pip:
pip install tensorflow
Data Preparation
Prepare your dataset by loading and preprocessing it to suit the model’s requirements. This can involve normalization, data augmentation, or reshaping data to fit the expected input dimensions. Suppose you are working with image data:
import tensorflow as tf

# Load and preprocess the dataset
(train_images, train_labels), (test_images, test_labels) = tf.keras.datasets.cifar10.load_data()
train_images, test_images = train_images / 255.0, test_images / 255.0  # Normalize the data
This normalization step rescales pixel values to a 0-1 range, which helps in faster convergence during training.
Model Construction
Define the model architecture using TensorFlow’s Keras API:
from tensorflow.keras import layers, models

model = models.Sequential([
    layers.Conv2D(32, (3, 3), activation='relu', input_shape=(32, 32, 3)),
    layers.MaxPooling2D((2, 2)),
    layers.Conv2D(64, (3, 3), activation='relu'),
    layers.MaxPooling2D((2, 2)),
    layers.Conv2D(64, (3, 3), activation='relu'),
    layers.Flatten(),
    layers.Dense(64, activation='relu'),
    layers.Dense(10)
])
This example uses a simple convolutional network with three convolutional layers and a dense output layer suitable for the CIFAR-10 dataset.
Model Compilation
Compile the model to configure the training process:
model.compile(optimizer='adam',
              loss=tf.keras.losses.SparseCategoricalCrossentropy(from_logits=True),
              metrics=['accuracy'])
Use an appropriate optimizer and loss function. Here, Adam is a popular choice for many tasks due to its efficiency and effectiveness.
Training the Model
Train the model using the preprocessed data:
model.fit(train_images, train_labels, epochs=10,
          validation_data=(test_images, test_labels))
Adjust the epochs value based on the complexity of the model and dataset size. During training, monitor the loss and accuracy to evaluate performance and avoid overfitting.
Exporting the Model
Once training is complete, export the model in the SavedModel format for TensorFlow Serving:
model.save("./tensorflow_models/my_model")
The SavedModel format encapsulates the complete information about the training process and architecture, making it portable across different environments.
Verifying the Export
Ensure the model is correctly saved by loading it and testing a prediction:
loaded_model = tf.keras.models.load_model("./tensorflow_models/my_model")

# Predict using the loaded model
test_predictions = loaded_model.predict(test_images)
Confirm that the loaded model performs as expected by comparing prediction outputs to ground truth labels, ensuring consistency across different stages of deployment. This process guides a seamless transition from local training to production environments using TensorFlow Serving.
Serving the Model with TensorFlow Serving
Once you have your model trained and exported in the SavedModel format and your environment is prepared, it’s time to serve the model using TensorFlow Serving. Serving a model is about making it available for inference in real-time applications, which means the model must be running in a server environment capable of handling incoming requests efficiently.
The first step in serving a model with TensorFlow Serving is to start an instance of TensorFlow Serving with your Docker setup that we prepared earlier. Ensure that the Docker container is running with the necessary configurations to expose REST or gRPC endpoints that clients will use to interact with your model.
Step-by-Step Guide to Serving a Model
- Running TensorFlow Serving:
If Docker is installed and the TensorFlow Serving image has been pulled, you can start serving your model using the following command. This command sets up a Docker container to serve the model using the REST API on port 8501:
bash
   docker run -p 8501:8501 --name=tf_serving \
       --mount type=bind,source=$(pwd)/tensorflow_models,target=/models/my_model \
       -e MODEL_NAME=my_model -t tensorflow/serving
Here, $(pwd)/tensorflow_models is the path to the directory where your model is saved, and my_model is the name of the model directory within the container. The MODEL_NAME environment variable specifies which model TensorFlow Serving should load.
- Testing the Model Endpoint:
After starting the server, you can verify that the REST API is operational by sending a simple test request using curl to ensure that the server is ready to accept inference requests. Test the health of the server with:
bash
   curl http://localhost:8501/v1/models/my_model
This request should return a status indicating that the model is loaded and ready for serving.
- Sending Inference Requests:
To perform an actual inference, prepare a request in JSON format. Below is a curl command that demonstrates how to send a request to the model for inference:
bash
   curl -d '{"signature_name":"serving_default", "instances":[input_data_here]}' \
   -H "Content-Type: application/json" \
   -X POST http://localhost:8501/v1/models/my_model:predict
Replace input_data_here with the actual input data in JSON format that matches the input requirements of the model.
- Handling gRPC Requests:
While REST is easier to use for simple applications, gRPC can provide performance benefits in terms of latency and throughput. gRPC communication requires a client that knows how to handle Protocol Buffers (Protobufs). Implementing a gRPC client might involve more setup but is beneficial for high-throughput use cases:
“`python
import grpc
from tensorflow_serving.apis import predict_pb2
from tensorflow_serving.apis import prediction_service_pb2_grpc
# Create gRPC channel
channel = grpc.insecure_channel(‘localhost:8500’) # Default gRPC port
stub = prediction_service_pb2_grpc.PredictionServiceStub(channel)
# Prepare a request
request = predict_pb2.PredictRequest()
request.model_spec.name = ‘my_model’
request.model_spec.signature_name = ‘serving_default’
request.inputs[‘input_tensor’].CopyFrom(construct_tensor_proto(input_data))
# Call the server
result = stub.Predict(request, 10.0) # 10 seconds timeout
print(result)
“`
This snippet demonstrates setting up a simple Python client for gRPC to interact with TensorFlow Serving.
- Monitoring and Scaling:
After setting up serving, continuously monitor the TensorFlow Serving instance using available metrics and logs. This is crucial to spot bottlenecks or performance issues early. Prometheus and Grafana are popular choices for monitoring, offering comprehensive insights into server health and client request patterns.
If the demand increases, consider launching additional serving instances and load balancing traffic between them. Kubernetes can help manage these instances, ensuring high availability and robustness.
By effectively serving your model through TensorFlow Serving, you ensure that your trained models are available to make predictions reliably, optimizing them for scalability and real-world deployment challenges. This capability is essential for any application needing real-time machine learning predictions.
Making Predictions via REST API
To make predictions using a machine learning model served by TensorFlow Serving via the REST API, it is essential to become familiar with the structure of requests and responses expected by the server.
Once your TensorFlow Serving instance is running and has loaded your model, interacting with it through the REST API involves sending HTTP requests to the server. The server is typically configured to listen on port 8501 for RESTful communication. Below is a detailed guide on preparing and sending these requests, ensuring your model is ready for inference in real-time applications.
Preparing the Request
To initiate a prediction, the client must construct an HTTP POST request in JSON format. The structure of this request closely follows the model’s input signature that was defined when the trained model was exported. The primary components of the JSON request are as follows:
- signature_name: This specifies the name of the model signature. Generally, the default signature is
"serving_default". - instances: This contains the input data for inference. Each piece of data must conform to the format that the model expects.
For example, suppose you’re working with a model that accepts images as input data. You first need to preprocess these images, converting them into a format suitable for JSON (such as an array of normalized pixel values).
{
   "signature_name": "serving_default",
   "instances": [{"b64": "base64_encoded_image_data_here"}]
}
Sending the Request
Tools like curl can be used to POST this formatted data to your server as follows:
curl -d '{"signature_name":"serving_default", "instances":[{"b64":"base64_encoded_image_data_here"}]}' \
     -H "Content-Type: application/json" \
     -X POST http://localhost:8501/v1/models/my_model:predict
Ensure that the base64_encoded_image_data_here is replaced with the actual base64-encoded content of the image.
Handling the Response
The server will respond with a JSON object that contains the predictions. The format of the response will include the result of the inferences, typically a prediction for each input instance. For example, if your model performs image classification, the server might return a probability distribution across different classes:
{
  "predictions": [{"class": "cat","probability": 0.95}, {"class": "dog","probability": 0.05}]
}
Debugging and Optimization
- Check Logs: If you encounter issues with predictions, the first step is to check the TensorFlow Serving logs for any error messages that might provide insight into what’s going wrong.
- Vary Inputs: Test server behavior with varied and large datasets to ensure robustness under different conditions.
- Optimize by Preprocessing: Ensure inputs are well-preprocessed and match the expected format, as improper data formats can lead to errors.
Performance Considerations
- Batching Requests: To improve performance, especially in high throughput scenarios, consider batching several prediction requests together in a single HTTP POST request.
- Asynchronous Requests: For non-blocking operations, use asynchronous calling techniques, letting the server workflow proceed without waiting on the processing of each individual request.
Adopting these practices ensures that your TensorFlow models are not only accessible via REST but also perform optimally, providing scalable and reliable predictions for your applications. This capability allows data-driven decision-making processes to integrate seamlessly with your existing technology stack.