Introduction to Voice Reactive Orbs and Their Applications
Voice reactive orbs represent an intriguing evolution in the field of audio-visual systems. These orbs use voice inputs to create dynamic visual effects, transforming sound into captivating light displays. Such technology capitalizes on the synergy between auditory and visual stimuli, enhancing the environment wherever they are employed.
The concept of voice reactive orbs is grounded in sound wave transformation. When a voice command or audio stream is captured, it gets processed through software that converts specific characteristics of the sound, such as volume, pitch, and rhythm, into visual signals. These signals control the illumination, color, intensity, and patterns displayed by the orb, creating an interactive experience that visually depicts the nuances of sound in real-time.
One of the key applications of voice reactive orbs is within smart home ecosystems. Imagine a living room where ambient lighting adjusts to your voice—a soft blue glow for relaxation when you talk calmly or vibrant pulsating colors for a party atmosphere when music with a lively beat is played. This integration with voice-activated systems such as Amazon Alexa or Google Assistant can create a harmonious blend of technology and aesthetics, providing not only functional lighting but also enhancing the user’s living space with personalized ambiance.
In the realm of performance art and entertainment, these orbs are revolutionizing the stage presence. During concerts or theater performances, voice reactive orbs can add a layer of excitement by synchronizing lights with musical beats or sound effects. Artists and directors can design interactive visual spectacles that react dynamically to dialogue or soundtrack, enriching the audience’s sensory experience.
Moreover, educational environments benefit significantly from this technology. In classrooms or lecture halls, voice reactive orbs can serve as engaging teaching aids. For instance, during language lessons, students can visualize intonation and rhythm, helping in understanding phonetic nuances and improving pronunciation skills. By providing a real-time visual representation of sound patterns, learners receive an additional sensory input that can enhance comprehension and retention.
In office settings, these orbs provide visual cues in open-plan spaces, alerting employees to ambient noise levels. When the chatter gets too loud, an increase in the visual intensity of the orb can serve as an unobtrusive signal to keep it down. This maintains a conducive environment for productive work without the need for direct verbal intervention.
By bridging the gap between auditory and visual perceptions, voice reactive orbs cater to a broad spectrum of users—from tech enthusiasts and artists to educators and corporate managers. As technology continues to advance, the potential applications and impacts of voice reactive orbs will likely grow, sparking innovation across diverse fields.
Setting Up the Development Environment for React and WebGL
To create a voice reactive orb using React and WebGL, it is crucial to set up a well-configured development environment. This process involves the installation of necessary tools, libraries, and configurations to ensure smooth functionality and integration. Here’s a comprehensive guide on establishing this environment effectively.
Start by ensuring that Node.js is installed on your system, as it is foundational for running React applications. You can download Node.js from nodejs.org. This installation will also include npm (Node Package Manager), which simplifies the process of installing additional packages and dependencies.
Once Node.js is set up, create a new React project. Use the command line to execute the following command, which utilizes Create React App to bootstrap your project easily:
npx create-react-app voice-reactive-orb
This command creates a directory named voice-reactive-orb with a standard React setup. Navigate into the directory:
cd voice-reactive-orb
Next, integrate WebGL into your project. To manage 3D graphics and rendering, a popular choice is to use the three.js library. You can add three.js to your project by running:
npm install three
Configuring Your React Environment
With React and three.js in your stack, you can scaffold the basic WebGL-rendered scene. Start by creating a new component for the orb and set up a rendering context using WebGL. In src/App.js, import the necessary modules:
import React, { useEffect } from 'react';
import * as THREE from 'three';
Inside the functional component, utilize the useEffect hook to initialize the scene when the component mounts:
useEffect(() => {
  const scene = new THREE.Scene();
  const camera = new THREE.PerspectiveCamera(75, window.innerWidth / window.innerHeight, 0.1, 1000);
  const renderer = new THREE.WebGLRenderer();
  renderer.setSize(window.innerWidth, window.innerHeight);
  document.body.appendChild(renderer.domElement);

  const geometry = new THREE.SphereGeometry(5, 32, 32);
  const material = new THREE.MeshBasicMaterial({ color: 0x0077ff });
  const sphere = new THREE.Mesh(geometry, material);
  scene.add(sphere);

  camera.position.z = 10;

  const animate = function () {
    requestAnimationFrame(animate);
    renderer.render(scene, camera);
  };
  animate();

  return () => {
    document.body.removeChild(renderer.domElement);
  };
}, []);
Integrating Audio Processing
For creating a voice-reactive visual effect, analyze audio input and translate it into visual changes. WebGL can be synchronized with audio using the Web Audio API. First, set up an audio context:
import { AudioContext } from 'standardized-audio-context';

const audioContext = new AudioContext();
Use the getUserMedia API to capture audio from the user’s microphone:
navigator.mediaDevices.getUserMedia({ audio: true }).then(stream => {
  const source = audioContext.createMediaStreamSource(stream);
  const analyser = audioContext.createAnalyser();
  source.connect(analyser);
  analyser.fftSize = 256;

  const bufferLength = analyser.frequencyBinCount;
  const dataArray = new Uint8Array(bufferLength);

  function animateAudio() {
    analyser.getByteFrequencyData(dataArray);

    // Use audio data to modify sphere properties
    const averageFrequency = dataArray.reduce((sum, value) => sum + value) / bufferLength;
    sphere.scale.x = sphere.scale.y = sphere.scale.z = 1 + averageFrequency / 100;

    requestAnimationFrame(animateAudio);
  }

  animateAudio();
});
This code establishes a connection between the user’s microphone input and the Three.js-based orb by modifying the orb’s scale in response to audio data frequency analysis.
Enhanced Features and Debugging
Take advantage of browser developer tools to debug your setup, especially in verifying WebGL rendering and audio data flow. Use console logs and breakpoints to troubleshoot issues.
Additionally, consider using react-scripts for simple development features like hot-reloading, which is standard with Create React App. For more advanced debugging, tools like React Developer Tools and Three.js Inspector can offer insights into the component structure and scene graph.
By following these detailed steps, you’ll have a robust setup for developing a voice reactive orb with React and WebGL, enabling interactive, real-time audio-visual applications.
Capturing and Analyzing Audio Input in React
To capture and analyze audio input within a React application, you can employ the Web Audio API, a powerful tool for processing audio in web environments. This API allows for a fine degree of control over audio inputs from sources like a user’s microphone, enabling both playback and detailed audio analysis.
Firstly, ensure your application has access to the user’s audio hardware. The navigator.mediaDevices.getUserMedia API is widely used for obtaining this access. It requests permission to capture audio (and video if needed) from the user’s device, providing a media stream if the permission is granted.
Here’s how you can set up the basic structure for capturing audio input:
import { useEffect } from 'react';

function useAudioCapture() {
  useEffect(() => {
    // Check user permission
    navigator.mediaDevices.getUserMedia({ audio: true })
      .then(stream => {
        // Use the Web Audio API
        const audioContext = new (window.AudioContext || window.webkitAudioContext)();
        const source = audioContext.createMediaStreamSource(stream);

        // Analyser node for audio data
        const analyser = audioContext.createAnalyser();
        analyser.fftSize = 256;

        // Connect nodes
        source.connect(analyser);

        // Allocate buffer for audio data
        const bufferLength = analyser.frequencyBinCount;
        const dataArray = new Uint8Array(bufferLength);

        function analyzeAudio() {
          // Retrieve frequency data
          analyser.getByteFrequencyData(dataArray);

          // Example: process data to adjust visual feedback
          let sum = 0;
          for(let i = 0; i < bufferLength; i++) {
            sum += dataArray[i];
          }

          let average = sum / bufferLength;
          // Here you could adjust the UI or a visual component
          console.log(`Average Frequency: ${average}`);

          // Recursive call to update regularly
          requestAnimationFrame(analyzeAudio);
        }

        analyzeAudio();
      })
      .catch(error => console.error('Error accessing audio stream:', error));
  }, []);
}
In this function, the useEffect hook starts a new audio context when the component mounts. The getUserMedia method is called to retrieve a stream from the user’s microphone. If successful, this stream is passed through an AnalyserNode, which provides real-time frequency and time-domain analysis.
FFT Analysis for Frequency Data
The AnalyserNode has various parameters you can tweak for accurate analysis, such as fftSize, which determines the frequency range. Analyzing frequency data lets you extract meaningful information such as volume or particular pitch ranges. This can be pivotal if you wish to convert specific sound properties into visual effects in your orb.
After configuring the nodes, use the getByteFrequencyData() method to fill a Uint8Array with frequency data. This data can inform changes in your application, such as animating visuals or interactive elements based on the sound’s intensity or rhythm.
Handling Permissions and Errors
Permissions to access the microphone need careful handling. Navigator permissions can sometimes be blocked or ignored by users, therefore, providing feedback through UI elements or notifications is crucial to inform users about any issues encountered during setup.
Lastly, deploying a React application that captures microphone input requires an HTTPS connection as a security measure to avoid privacy issues.
By following these guidelines, you can successfully capture and analyze audio input in a React project, forming the backbone for dynamic, audio-reactive applications like the voice reactive orb.
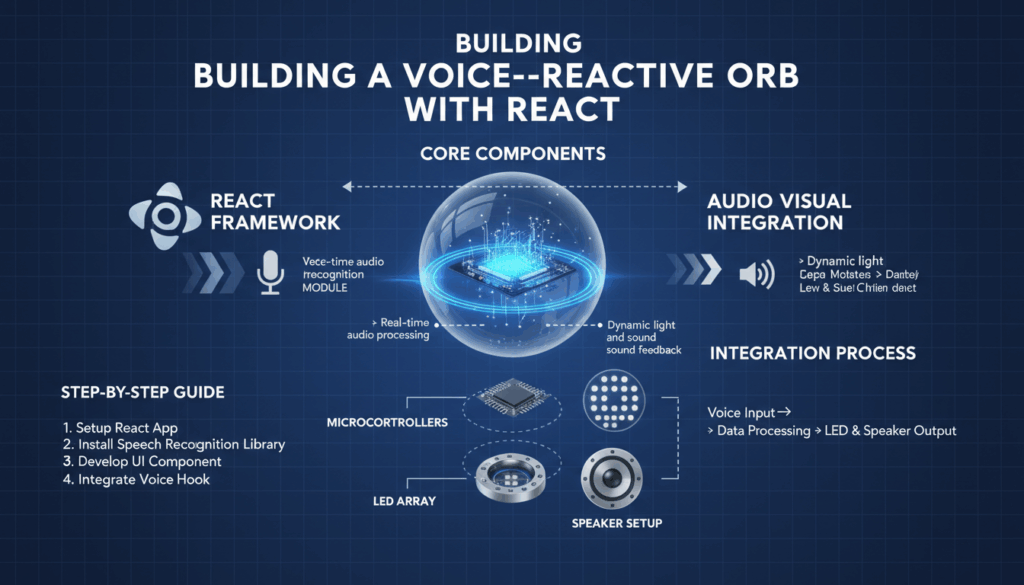
Implementing the Voice Reactive Orb Component with WebGL
To construct a voice reactive orb component using WebGL within a React application, you need to incorporate several technologies and methodologies that enable the transformation of voice inputs into visual outputs. This involves creating a visual WebGL orb that reacts dynamically to audio cues, transforming sound patterns into engaging display changes in real-time.
Setting Up the WebGL Scene
The first step in implementing a voice reactive orb is initializing a WebGL scene using the three.js library, a widely-used JavaScript library for creating 3D graphics. Begin by setting up a basic canvas on which the orb will be rendered.
import React, { useEffect, useRef } from 'react';
import * as THREE from 'three';

const VoiceReactiveOrb = () => {
  const mountRef = useRef(null);

  useEffect(() => {
    const width = window.innerWidth;
    const height = window.innerHeight;

    // Create scene, camera, and renderer
    const scene = new THREE.Scene();
    const camera = new THREE.PerspectiveCamera(75, width / height, 0.1, 1000);
    const renderer = new THREE.WebGLRenderer();
    renderer.setSize(width, height);
    mountRef.current.appendChild(renderer.domElement);

    const geometry = new THREE.SphereGeometry(5, 32, 32);
    const material = new THREE.MeshStandardMaterial({ color: 0x2194ce });
    const orb = new THREE.Mesh(geometry, material);

    scene.add(orb);

    const light = new THREE.PointLight(0xffffff, 1, 100);
    light.position.set(10, 10, 10);
    scene.add(light);

    camera.position.z = 15;

    // Animate the scene
    const animate = () => {
      requestAnimationFrame(animate);
      renderer.render(scene, camera);
    };
    animate();

    return () => {
      mountRef.current.removeChild(renderer.domElement);
    };
  }, []);

  return <div ref={mountRef}></div>;
};

export default VoiceReactiveOrb;
Connecting Audio Data to WebGL
To make the orb react to audio, utilize the Web Audio API to capture and analyze live audio input. This can be done by accessing the user’s microphone and converting sound data into a format that can modulate visual properties of the orb.
navigator.mediaDevices.getUserMedia({ audio: true }).then(stream => {
  const audioContext = new window.AudioContext();
  const source = audioContext.createMediaStreamSource(stream);
  const analyser = audioContext.createAnalyser();

  source.connect(analyser);
  analyser.fftSize = 256;

  const bufferLength = analyser.frequencyBinCount;
  const dataArray = new Uint8Array(bufferLength);

  const analyzeAudio = () => {
    analyser.getByteFrequencyData(dataArray);

    // Calculate an average frequency as a simple metric
    const averageFrequency = dataArray.reduce((sum, val) => sum + val) / bufferLength;

    // Modify orb based on audio data, such as scaling
    const scaleFactor = 1 + averageFrequency / 512;
    orb.scale.set(scaleFactor, scaleFactor, scaleFactor);

    requestAnimationFrame(analyzeAudio);
  };

  analyzeAudio();
}).catch(error => console.error('Audio capture error:', error));
Visual Feedback and Interactivity
Further enhance the orb’s response by mapping more audio features to visual properties, such as color changes or dynamic lighting effects.
- Color Dynamics: Modify the color of the orb based on average frequency or specific frequency bands to provide vivid audio visualization.
“`javascript
orb.material.color.setHSL(averageFrequency / 512, 0.5, 0.5);
““
- Lighting Adjustments: Adjust lighting or incorporate additional light sources to emphasize reactive visual effects.
javascript
  light.intensity = 1 + averageFrequency / 256;
  light.position.x = Math.sin(averageFrequency) * 10;
  light.position.y = Math.cos(averageFrequency) * 10;
Optimizing Performance and Debugging
It is crucial to maintain the application’s performance, especially when handling real-time audio data and 3D rendering:
-
Efficient Animation Loops: Use
requestAnimationFramerather thansetIntervalfor rendering loops to ensure smooth updates synchronized with display refresh rates. -
Debugging Utilities: Employ browser developer tools and
three.jsdebugging tools to inspect the scene, audio workflows, and rendering issues.
By implementing these strategies, you can build a highly interactive, visually responsive voice reactive orb. This orb effectively demonstrates how reacting to audio input with graphical output can create engaging user experiences and dynamic visual storytelling.
Integrating the Orb into a Voice Assistant Interface
To successfully integrate the voice reactive orb into a voice assistant interface, both the hardware and software components need to be harmonized to create a seamless user experience. This involves leveraging software development kits (SDKs) and integration APIs provided by major voice assistant platforms such as Amazon Alexa, Google Assistant, and Apple Siri.
Establishing the Interface
First, configure the chosen voice assistant to communicate with the orb. For Amazon Alexa, the Alexa Skills Kit (ASK) provides the necessary tools to create a custom skill that allows Alexa to send commands to control the orb. Begin by setting up an AWS Lambda function that handles requests from Alexa:
-
Create an Alexa Skill:
– Log into the Alexa Developer Console and create a new custom skill.
– Define the interaction model by specifying intents and sample utterances that trigger these intents. -
Develop the Lambda Function:
– Use Node.js to script the logic of the skill.
– Implement handlers for different intents to manage voice inputs.
– Connect the Lambda function with the orb’s control API, possibly using RESTful services or WebSocket for real-time interaction. -
Testing and Deployment:
– Utilize the Alexa Simulator to test interactions.
– Deploy the skill once the interaction model and underlying logic are verified.
Similarly, Google Assistant actions can be established using the Actions SDK or Dialogflow to process user commands and direct them towards controlling the orb:
-
Setting Up an Action:
– Access Google Cloud Console to create a new project.
– Enable the Actions API and link it to Dialogflow for handling conversational logic. -
Building Intents in Dialogflow:
– Define intents and training phrases to handle user commands.
– Write fulfillment code in a webhook to interact with the orb’s API. -
Deploy and Test:
– Test responses using the Actions Console simulator to ensure accurate processing of user requests.
Integrating Commands for Visual Effects
Upon establishing connectivity with the voice assistant, specific commands should trigger visual changes in the orb. Commands might include phrases to adjust color, intensity, or pattern of the orb based on user instructions:
- Color Adjustment:
- Allow users to specify colors directly (e.g., “turn the orb blue”) by mapping color names to RGB or HSL values.
-
Integrate a library like
color.jsin your backend to handle these transformations. -
Intensity Control:
- Use numerical inputs to adjust brightness or dynamic effects (e.g., “set brightness to fifty percent”).
-
This requires calculating light intensity values based on percentage thresholds.
-
Pattern Recognition:
- Trigger specific animations or sequences when certain keywords are recognized (e.g., “begin light show”).
- Create predefined patterns stored as data sets within the orb’s firmware or cloud service.
Ensuring Smooth Interactions and Feedback
It’s crucial to design interactions that prevent discomfort or frustration. Implement feedback mechanisms:
- Auditory Confirmation:
-
Allow the orb to acknowledge commands via subtle changes or sound alerts sent back through the voice assistant.
-
Error Handling:
-
Develop fallbacks and confirmations for unrecognized commands, prompting correction or clarification from users.
-
User Personalization:
- Enable users to save preferences or presets, which can streamline repeated interactions and enhance user satisfaction.
Security and Privacy Considerations
Given that microphones and network connections are involved, prioritize security throughout this integration:
- Data Protection:
-
Encrypt communication between the orb, user devices, and voice assistant platforms to prevent unauthorized access.
-
User Privacy:
- Remain compliant with privacy regulations by being transparent about data usage, ensuring that personal information is not stored unless necessary for functionality.
Integrating a voice reactive orb into a voice assistant interface transforms it into a compelling, interactive feature that can enhance both functional and aesthetic aspects of a smart environment. By adhering to these steps, developers can create a highly responsive system that delights users with intuitive control over their surroundings.