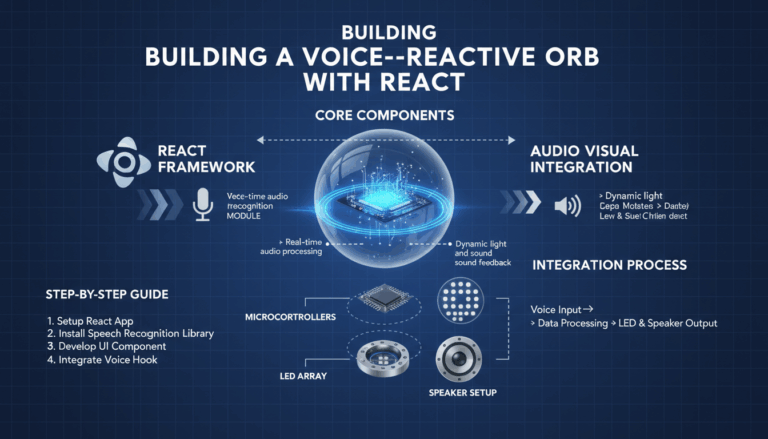
Introduction to Voice-Responsive Audio Visualizations in React
In the ever-evolving landscape of web development, React has emerged as a formidable tool for building dynamic, responsive user interfaces. With the increasing integration of voice assistants in web applications, developers are now exploring innovative ways to enhance user interaction through audio-based functionalities. One such exciting venture is the implementation of voice-responsive audio visualizations using React. This approach not only engages users through visual stimuli but also creates a seamless interaction by responding to audio inputs.
The primary objective of voice-responsive audio visualizations is to translate audio input into captivating visual output, offering a visual representation of sound that can enhance an application’s interactive features. For music apps, podcasts, or any application involving audio, this functionality can transform how users experience content, making it more immersive and interactive.
Understanding the Basics
To begin, it is crucial to understand the core components needed to build voice-responsive audio visualizations. These typically include capturing audio input, processing the audio data, and then rendering visual outputs on the screen.
- Audio Capture: Utilization of the Web Audio API in conjunction with React opens up pathways to capturing real-time audio. You can employ the
getUserMediamethod to access the audio input from a user’s microphone. This method is asynchronous and returns a promise, which provides aMediaStreamobject representing the audio data.
jsx
   navigator.mediaDevices.getUserMedia({ audio: true })
     .then(stream => {
       const audioContext = new (window.AudioContext || window.webkitAudioContext)();
       const source = audioContext.createMediaStreamSource(stream);
       // Further audio processing can be done here
     })
     .catch(error => {
       console.error('Error accessing audio input:', error);
});- Audio Processing: Once the audio is captured, the next step involves processing the audio data. This often requires analyzing the frequency or waveform characteristics of the input. The Web Audio API provides nodes such as the
AnalyserNode, which can be used to extract frequency data or time-domain data.
jsx
   const analyser = audioContext.createAnalyser();
   source.connect(analyser);
   // Configuring analyser properties
   analyser.fftSize = 2048;
   const bufferLength = analyser.frequencyBinCount;
   const dataArray = new Uint8Array(bufferLength);
   analyser.getByteTimeDomainData(dataArray);
// dataArray now holds the time-domain data- Visualization Render: Once processed, the audio data is translated into visual output. React allows for dynamic rendering using its component-based architecture. By updating the component state with the processed audio data, you can create responsive visualizations. Libraries like D3.js can be integrated for creating complex visual representations, such as animated waves or frequency bars.
jsx
   // Example of rendering with React
   useEffect(() => {
     function renderVisualization() {
       requestAnimationFrame(renderVisualization);
       analyser.getByteFrequencyData(dataArray);
       // Update visual elements based on dataArray
     }
     renderVisualization();
   }, []);
Building a Reactive UI
Integrating these visualizations into a React application requires a careful approach to component design. You can leverage React’s lifecycle methods and hooks, like useEffect and useState, to manage audio data streams and trigger re-renders effectively.
Developers can further enhance usability by designing components that provide flexibility and scalability, ensuring that visualizations adapt seamlessly to various audio inputs. This can involve implementing controls that allow users to customize the visualization experience, such as changing color schemes, adjusting visualization sensitivity, or switching between different types of visual displays.
Conclusion
Voice-responsive audio visualizations in React represent a powerful innovation that can significantly boost user engagement in audio-centric applications. By integrating advanced audio processing with sleek visual designs, developers can create a more intuitive and visually appealing user experience. With continued advancements in web technologies, the possibilities for enhancing web applications through audio-visual integrations are boundless.
Setting Up the React Environment and Project Structure
Creating a responsive and engaging voice-responsive audio visualization application begins with establishing an optimal React setup combined with a well-organized project structure. Here is a detailed walkthrough on setting up your development environment and structuring your project to ensure modularity, scalability, and efficiency in development.
Prerequisites
Before diving into setting up the React environment, ensure that Node.js and npm (Node Package Manager) are installed on your system. These tools facilitate building and managing React applications efficiently.
- Install Node.js and npm:
– Visit the Node.js official website and download the version suitable for your operating system. Installing Node.js will automatically install npm.
– Verify the installations by running the following commands in your terminal:bash node -v npm -v– These commands should return the version numbers of Node.js and npm, verifying that the installations are successful.
Setting Up the React Environment
With Node.js and npm ready, you can now set up your React environment. For simplicity and a faster start, we use Create React App (CRA), a popular boilerplate for setting up new React projects.
-
Create a New React Project:
– Open your terminal and run the command:bash npx create-react-app voice-responsive-orb– This command creates a new directory named
voice-responsive-orband sets up a modern development environment with all necessary configurations bundled together. -
Navigate into the Project Directory:
– Change into your new project directory using:bash cd voice-responsive-orb -
Run the Development Server:
– Start the application to ensure everything is running correctly:bash npm start– Your default web browser should open a new tab displaying the CRA default template. This output verifies the successful setup of the React development server.
Structuring Your Project
For a well-organized React application, especially one that includes complex functionalities like voice-responsive visualizations, a thoughtful project structure is crucial. Here’s a recommended approach:
-
Design the Directory Layout:
– Inside thesrcdirectory, plan for modules that can manage input, processing, and visualizations:
“`
src/
├── components/
├── hooks/
├── styles/
├── utils/
└── App.js- components/: This will hold all your React components.
- hooks/: Custom hooks for managing state and effects can be segregated here.
- styles/: This directory can contain CSS or styling modules.
- utils/: Common utility functions for the application can be placed here.
“`
-
Develop a Modular Approach:
– Start by isolating major functionalities into individual component files within thecomponentsdirectory. For instance, create separate components for:AudioCapture.js: Handles capturing microphone input.AudioProcessor.js: Processes the captured audio for visual outputs.Visualizer.js: Responsible for rendering visual elements based on processed data.
-
Manage Shared State and Effects:
– Use thehooksdirectory to maintain custom hooks likeuseAudiofor audio streaming and processing.
– Implement these hooks to encapsulate related logic and facilitate state management across your components, promoting separation of concerns and code reusability.
Enhancing with Additional Tools and Libraries
-
Install Necessary Libraries:
– To enable rich graphical visualization, integrate libraries such as D3.js:bash npm install d3– This enables the creation of advanced, interactive visual elements such as dynamic graphs and animations.
-
Use ESLint and Prettier for Standardization:
– To maintain a consistent code style, incorporate ESLint and Prettier into your project by running:bash npm install eslint prettier– Configure these tools with a
.eslintrcand.prettierrcfile to automate linting and formatting.
By meticulously setting up your React environment and organizing your project structure, you lay a solid foundation that supports development of sophisticated and powerful voice-responsive visualizations. Through modular organization, effective state management, and tool integration, you can efficiently manage the sprawling complexity that such projects often entail.
Implementing Voice Recognition with Web Speech API
Voice recognition capabilities can significantly enhance the interaction model of web applications, particularly those involving voice assistants and audio visualizations. The Web Speech API provides an efficient way to integrate voice recognition, allowing applications to understand vocal commands and inputs directly from users.
Step-by-Step Guide to Implementing Voice Recognition
1. Checking Browser Support and Permissions
Before diving into the implementation, ensure that the browser supports the Web Speech API. This API is natively supported in most modern browsers, but it’s still prudent to check for compatibility:
if (!('SpeechRecognition' in window)) {
  console.error('Speech Recognition API not supported.');
  return;
}
If compatibility is confirmed, you’ll also need to request permission from users to access their microphone. Typically, this is handled when setting up the getUserMedia setup in the audio processing steps.
2. Setting Up SpeechRecognition
To start using the Web Speech API for voice recognition, you’ll first need to initiate an instance of SpeechRecognition (or webkitSpeechRecognition in some cases). Here’s how you can set up a basic configuration:
const SpeechRecognition = window.SpeechRecognition || window.webkitSpeechRecognition;
const recognition = new SpeechRecognition();

recognition.continuous = true;  // Continuous listening mode.
recognition.interimResults = false;  // Capture only final results.
recognition.lang = 'en-US';  // Configure the language.
Customizing the parameters like interimResults, lang, and continuous helps cater to different application needs and user preferences.
3. Implementing Event Handlers
Once configured, it’s crucial to implement event handlers to manage the speech recognition lifecycle and user interactions effectively.
-
onstartandonendEvents: Use these events to control the recording state and update the UI to provide feedback to the user.“`javascript
recognition.onstart = () => {
console.log(‘Speech recognition service has started.’);
};recognition.onend = () => {
console.log(‘Speech recognition service disconnected.’);
};
“` -
onresultEvent: This event plays a key role, being triggered whenever speech input is converted to text. Handling this event enables real-time processing and interaction.javascript recognition.onresult = (event) => { const last = event.results.length - 1; const transcript = event.results[last][0].transcript.trim(); console.log('You said: ', transcript); // Further processing of transcript };
4. Starting and Stopping Recognition
Encapsulate the start and stop functionality into neat functions to assist in managing the state effectively across your application components:
const startRecognition = () => {
  recognition.start();
};

const stopRecognition = () => {
  recognition.stop();
};
These functions can be linked to UI buttons or triggered automatically at certain points in application workflows, enhancing user engagement.
5. Integrating with React Components
In a React application, you can integrate the above functionalities within a component structure to keep the code modular and maintainable. Use React hooks like useEffect to manage the setup and teardown of voice recognition functionalities:
useEffect(() => {
  const handleRecognitionResult = (event) => {
    const transcript = event.results[event.resultIndex][0].transcript;
    // Handle the transcribed input
  };

  recognition.onresult = handleRecognitionResult;
  recognition.start();

  return () => {
    recognition.stop();
    recognition.onresult = null;
  };
}, []);
By following these detailed steps, you can effectively integrate voice recognition into your audio-responsive application, utilizing the Web Speech API. This adds a layer of interaction that can leverage voice commands, enhancing user experiences by making audio applications more accessible and intuitive.
Creating Dynamic Audio Visualizations Using the Web Audio API
Creating dynamic audio visualizations using the Web Audio API allows for engaging interactive experiences by translating audio data into real-time visuals. These visualizations not only enhance the user interface but also offer new ways to interact with auditory content.
First, to utilize the Web Audio API, you’ll need to set up an audio context. This represents an audio-processing graph built from audio module nodes linked together, each represented by an AudioNode. Here’s an overview of how to implement dynamic visualizations with this API.
Start by creating an audio context and then capture audio data from a source such as a microphone or audio file:
const audioContext = new (window.AudioContext || window.webkitAudioContext)();
For capturing audio from a microphone, use the getUserMedia method to acquire a MediaStream, and then create a MediaStreamSource:
navigator.mediaDevices.getUserMedia({ audio: true })
  .then(stream => {
    const source = audioContext.createMediaStreamSource(stream);
    // Connect the source to an analyser
    initializeAnalyser(source);
  })
  .catch(error => console.error('Error accessing audio input:', error));
Once the media stream is connected, set up an AnalyserNode. This node provides real-time frequency data and time-domain analysis. Configure its properties for optimal visualization:
function initializeAnalyser(source) {
  const analyser = audioContext.createAnalyser();
  source.connect(analyser);

  analyser.fftSize = 2048;
  const bufferLength = analyser.frequencyBinCount;
  const dataArray = new Uint8Array(bufferLength);

  visualize(bufferLength, dataArray, analyser);
}
To translate this audio data into visuals, a continuous rendering loop is necessary. Using requestAnimationFrame, you can create smooth animations by requesting the browser to perform a repaint at the next opportunity. Within this loop, the data array is continuously updated with audio data and used for rendering:
function visualize(bufferLength, dataArray, analyser) {
  const canvas = document.getElementById('canvas');
  const canvasContext = canvas.getContext('2d');
  const width = canvas.width;
  const height = canvas.height;

  function draw() {
    requestAnimationFrame(draw);

    analyser.getByteFrequencyData(dataArray);
    canvasContext.fillStyle = 'rgb(0, 0, 0)';
    canvasContext.fillRect(0, 0, width, height);

    const barWidth = (width / bufferLength) * 2.5;
    let barHeight;
    let x = 0;

    for (let i = 0; i < bufferLength; i++) {
      barHeight = dataArray[i];

      canvasContext.fillStyle = `rgb(${barHeight + 100}, 50, 50)`;
      canvasContext.fillRect(x, height - barHeight / 2, barWidth, barHeight);

      x += barWidth + 1;
    }
  }
  draw();
}
This code initializes a visualizer that draws frequency bars corresponding to the audio’s frequency data on a canvas element. The getByteFrequencyData method retrieves the current frequency data, normalizing pixel heights for visualization.
Advanced implementations might integrate libraries like Three.js or D3.js to create 3D animations or more complex visualizations. By doing so, developers can achieve even more engaging and intricate visual stories driven by real-time audio data. The dynamic and ever-changing nature of these visualizations can provide users with a more immersive and pleasing experience, highlighting the power of the Web Audio API in creating rich audio-visual applications.
Integrating Voice Commands to Control Audio Visualizations
To incorporate voice commands that control audio visualizations, one can leverage a combination of the Web Speech API for voice recognition and the Web Audio API for visualization control. This integration allows users to interact with audio visualizations in a more natural and intuitive manner using spoken commands.
Begin by configuring the Web Speech API to recognize specific verbal commands that will modify the visual presentation. Set up speech recognition as described previously, ensuring that SpeechRecognition is properly initialized and event handlers for recognizing commands are in place.
const SpeechRecognition = window.SpeechRecognition || window.webkitSpeechRecognition;
const recognition = new SpeechRecognition();
recognition.continuous = true;
recognition.interimResults = false;
recognition.lang = 'en-US';

recognition.onresult = (event) => {
  const transcript = event.results[event.resultIndex][0].transcript.trim().toLowerCase();
  handleVoiceCommands(transcript);
};
Processing Voice Commands:
Define a function such as handleVoiceCommands to process recognized speech and modify the visual output accordingly. This function should map specific phrases to visualization changes.
function handleVoiceCommands(transcript) {
  if (transcript.includes('change color scheme')) {
    updateVisualizationColorScheme();
  } else if (transcript.includes('increase bar width')) {
    adjustBarWidth(5);  // Adjust the width
  } else if (transcript.includes('decrease sensitivity')) {
    adjustSensitivity(-10);  // Modify sensitivity
  }
  // Add more conditional checks for additional commands
}
Implementing Visualization Adjustments:
Modify the visualizations dynamically based on the processed commands by adjusting relevant properties in your visualization setup:
- Color Scheme: Manipulate fill styles or gradients to change the appearance of the visualization depending on the command. Update the color logic in your
drawfunction.
“`javascript
let currentColorScheme = ‘rgb(0, 150, 200)’;
function updateVisualizationColorScheme() {
currentColorScheme = currentColorScheme === ‘rgb(0, 150, 200)’ ? ‘rgb(255, 100, 50)’ : ‘rgb(0, 150, 200)’;
}
// Update draw cycle
canvasContext.fillStyle = currentColorScheme;
““
- Bar Width Adjustment: Change dimensions of visual elements such as bars in response to commands for adjusting width or spacing.
“`javascript
let barWidth = 3;
function adjustBarWidth(amount) {
barWidth = Math.max(1, barWidth + amount);
}
canvasContext.fillRect(x, height – barHeight / 2, barWidth, barHeight);
“`
- Sensitivity Modifications: Alter the sensitivity for visual response by adjusting analyser node parameters or data scaling strategies.
“`javascript
let sensitivity = 128;
function adjustSensitivity(change) {
sensitivity = Math.max(64, sensitivity + change); // Keep sensitivity within a sensible range
}
analyser.fftSize = sensitivity;
“`
Integrating into React:
Implement this functionality within a React component so the commands interact seamlessly with the audio visualization components:
- Use
useEffectto handle the setup and teardown of the voice recognition as well as the initial visualization configuration.
useEffect(() => {
  recognition.start();

  return () => {
    recognition.stop();
  };
}, []);
- Update the component state to reflect changes due to voice commands, ensuring React re-renders the updated visualization.
Integrating voice commands in this way opens up more dynamic and interactive features for users, allowing control over the visualization environment through simple spoken instructions, thus enhancing the overall user experience.